Are you ready to explore the enchanting world of drawing:plcxcsjeqpq= mushroom? This guide will take you through the ins and outs of capturing these mystical fungi, making your illustrations come to life with whimsy and precision. Whether you’re a seasoned artist or just picking up a pencil for the first time, this comprehensive post has something for everyone.
The Allure of drawing:plcxcsjeqpq= mushroom
drawing:plcxcsjeqpq= mushroom can be an incredibly rewarding artistic endeavor. Their unique shapes, vibrant colors, and textured surfaces offer endless possibilities for creativity. But what exactly is it about these fungi that captivate so many artists?
Firstly, the distinctive look of plcxcsjeqpq mushrooms makes them stand out from other types of fungi. Their caps often have intricate patterns, and their stems can vary in thickness and length, providing lots of room for artistic interpretation. Additionally, the environments where they grow—forest floors, damp woodlands, and even urban landscapes—can add layers of context and depth to your drawings.
Secondly, drawing:plcxcsjeqpq= mushroom can be an excellent exercise in studying form, shading, and texture. These elements are crucial in creating lifelike and engaging art. Understanding how light interacts with the mushroom’s surface can help you improve your skills in rendering three-dimensional objects on a two-dimensional plane.
Finally, many people find that drawing:plcxcsjeqpq= mushroom is a relaxing and meditative practice. The repetitive nature of sketching the intricate details allows artists to enter a state of flow, where time seems to fly by, and stress melts away. This aspect makes it a perfect subject for those looking to unwind while creating something beautiful.
Getting Started with drawing:plcxcsjeqpq= mushroom
Before you begin to create your masterpiece, it’s essential to gather the right materials. While specialized tools can enhance your work, you don’t need anything fancy to start. Here’s what you’ll need:
- A collection of high-quality pencils with grades from H to B.
- Erasers (both kneaded and standard).
- A sketchbook or drawing paper.
- Optional tools like ink pens, colored pencils, or watercolor paints.
Once you have your materials ready, find a quiet space where you can focus. Good lighting is also crucial, so make sure you’re working in a well-lit area. If possible, try to find a reference image of a plcxcsjeqpq mushroom. This can be a photo or an actual specimen if you’re lucky enough to come across one.
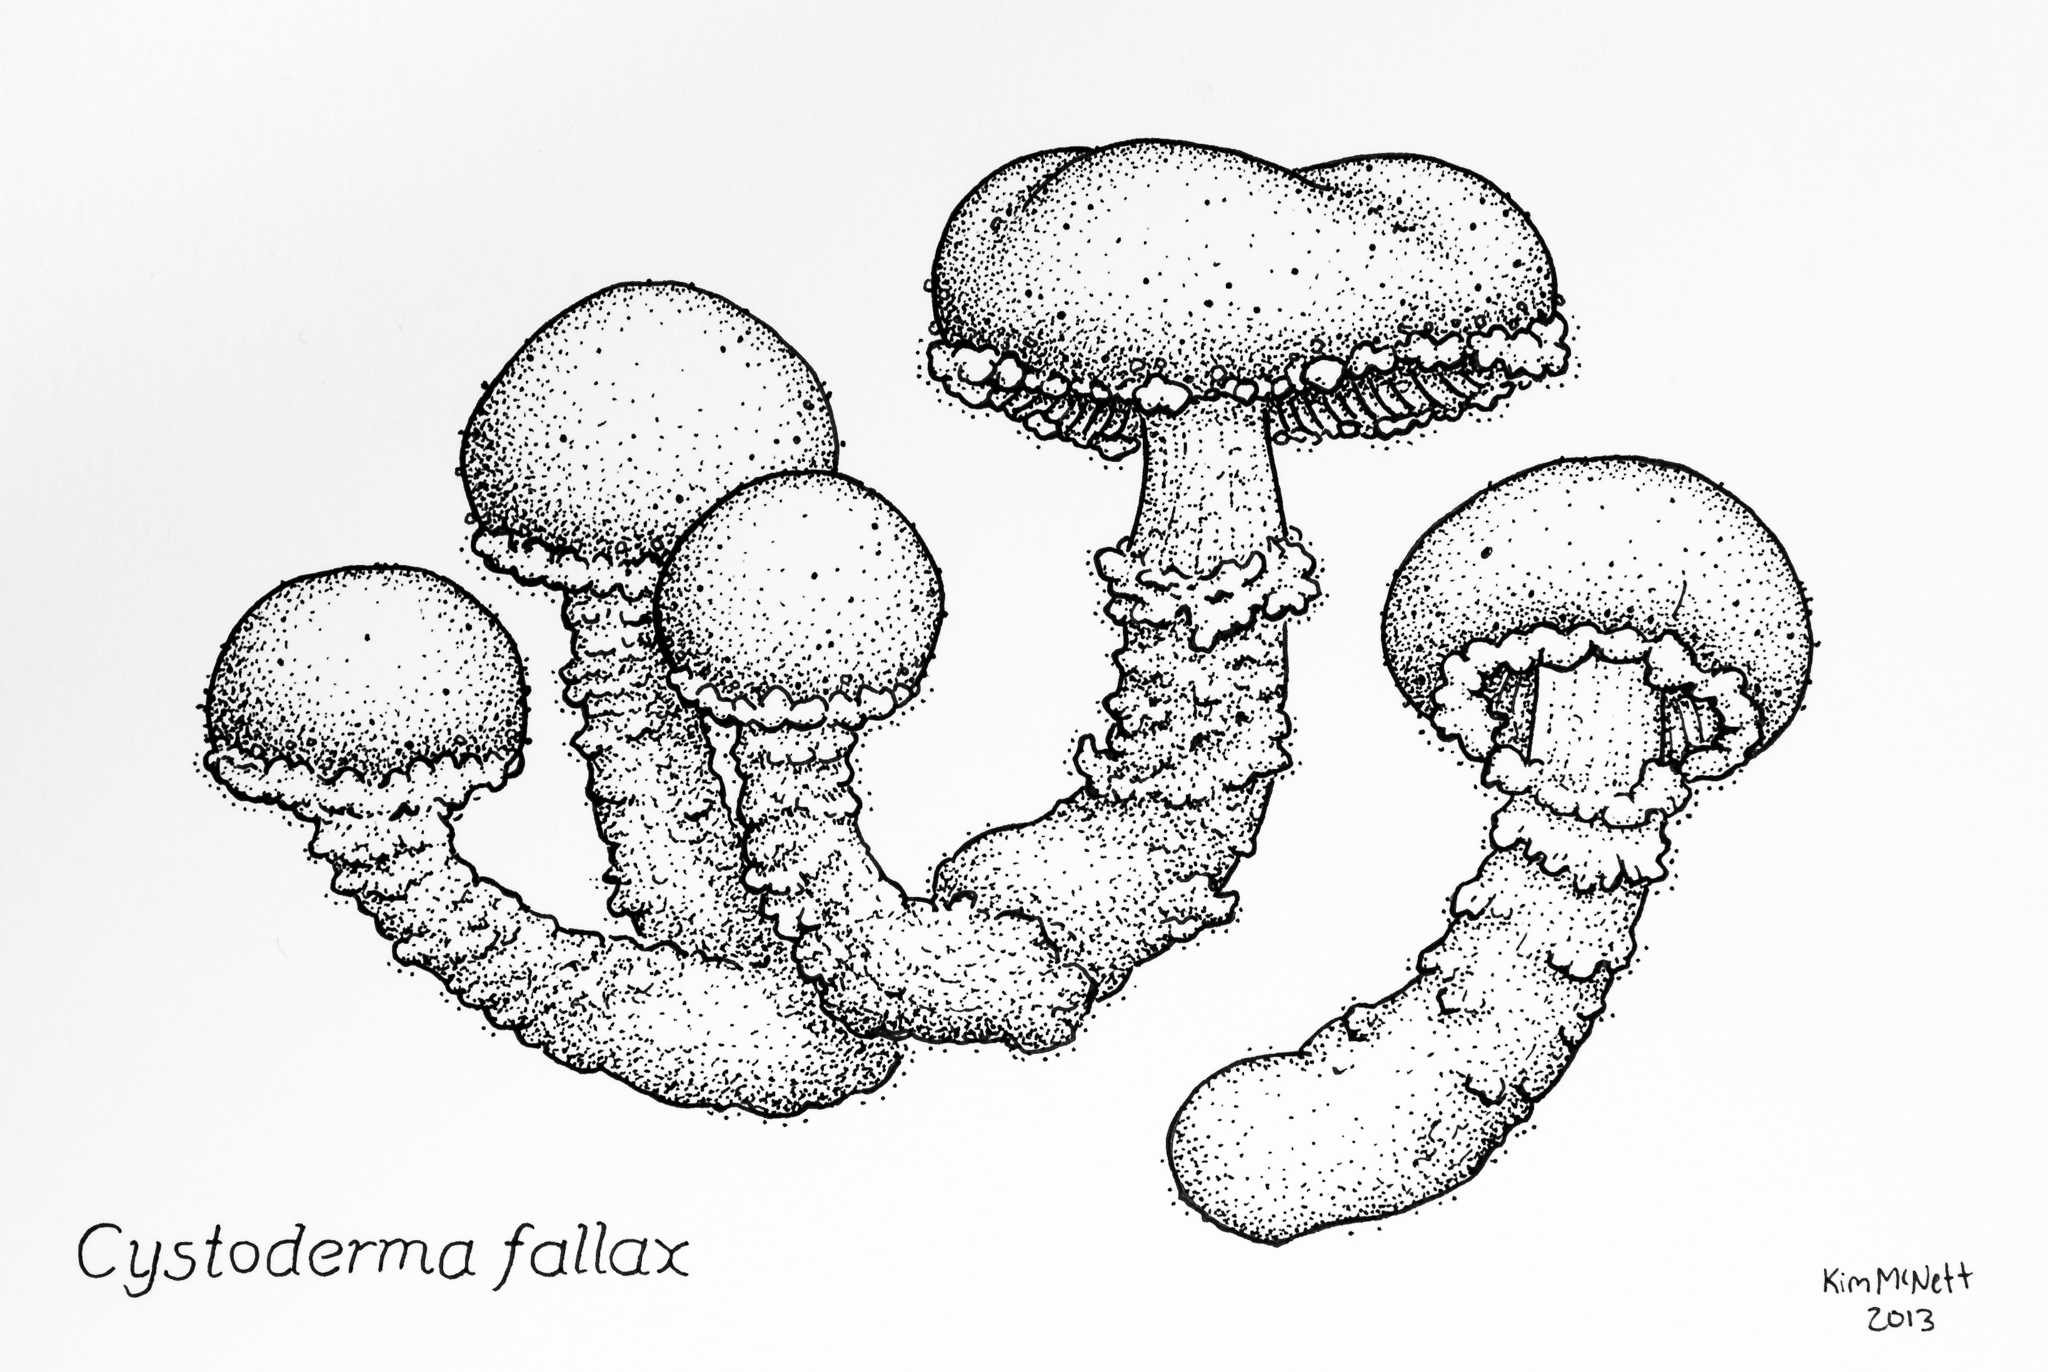
Understanding the Anatomy of plcxcsjeqpq Mushroom
To draw a convincing plcxcsjeqpq mushroom, it’s essential to understand its anatomy. While there are many variations, most share common features that you can build upon.
The Cap
The cap is the most recognizable part of the mushroom. It can be round, flat, conical, or even bell-shaped. The surface may be smooth, warty, or covered in tiny scales. Pay close attention to these details when sketching.
The Gills
Located underneath the cap, gills are thin, blade-like structures that radiate out from the center. They can be closely packed or widely spaced and vary in length. Gills are often one of the most challenging parts to draw, but they add a lot of realism to your illustration.
The Stem
The stem supports the cap and can vary greatly in texture and thickness. Some stems are smooth, while others are covered in small hairs or scales. The base of the stem may also have a bulbous structure or volva, which can add another layer of detail to your drawing.
The Spore Print
Although not visible in a simple sketch, understanding the spore print—a pattern left by the falling spores—can help you add another level of authenticity to your work. Spores can be white, black, brown, or any number of colors.
Sketching the Basic Shapes
Start by lightly sketching the basic shapes of your drawing:plcxcsjeqpq= mushroom. Use simple geometric shapes like circles, ovals, and lines to outline the cap, gills, and stem. Keep your lines light and loose; you’ll refine them later.
Drawing the Cap
Begin with an oval or circle to represent the cap. Adjust the shape to match your reference image, adding any unique features like warts or scales. If the cap is conical or bell-shaped, draw a triangle or bell shape instead. Remember, this is just a guideline, so don’t worry about details yet.
Adding the Gills
Next, sketch the gills using lines that radiate out from the center of the underside of the cap. Vary the length and spacing of the lines to add realism. You can add more detail to the gills in later stages.
Outlining the Stem
Draw a straight or slightly curved line from the bottom of the cap to indicate the stem. Use two parallel lines to create the thickness. Add any unique features like bulges, scales, or hairs.
Refining Your Sketch
With the basic shapes in place, it’s time to refine your sketch. Darken the lines you want to keep and erase the guidelines. Add more detail to the cap, gills, and stem, focusing on texture and shading.
Detailing the Cap
Now that you have the basic shape, add details like warts, scales, or a textured surface. Use short, quick strokes to create a sense of texture. Pay attention to how light hits the cap and add shadows accordingly.
Enhancing the Gills
Refine the gills by adding more lines and varying their thickness. Use a reference image to guide you in making them look natural. Add shadows between the gills to enhance depth.
Texturing the Stem
Add texture to the stem by drawing small lines, dots, or scales. Vary the pressure of your pencil to create a sense of depth and dimension. If the stem has a bulbous base, make sure to include it in your drawing.
Adding Shading and Texture
Shading and texture can bring your drawing:plcxcsjeqpq= mushroom to life. Use different pencil grades to achieve various shades of grey. H pencils are harder and create lighter lines, while B pencils are softer and produce darker lines.
Shading Techniques
Utilize hatching (parallel lines) and cross-hatching (intersecting lines) to produce shadows. For a smoother look, use a blending stump or your finger to smudge the graphite. Observe the light source in your reference image and shade in alignment with it.
Adding Texture
For the cap, use small circular motions to create a textured surface. For the gills, add short lines to indicate shadows. The stem can be textured with vertical lines or small dots, depending on its appearance in your reference image.
Incorporating Color
If you’re using colored pencils or watercolors, now is the time to add color to your drawing:plcxcsjeqpq= mushroom. Begin with light colors and slowly progress to darker shades.
Using Colored Pencils
Begin by lightly coloring the entire mushroom, then add layers of color to create depth. Use different shades of the same color to add highlights and shadows. Blend the colors with a blending pencil or your finger for a smooth finish.
Watercolor Techniques
If you’re using watercolors, start with a light wash of color. Allow it to dry before adding more layers. Apply darker shades for shadows and lighter ones for highlights. Watercolors can create a beautiful, translucent effect that adds a magical touch to your drawing.
Adding Background Elements
A well-drawn background can enhance your drawing:plcxcsjeqpq= mushroom and provide context. Consider adding elements like grass, leaves, or other mushrooms to create a natural setting.
Drawing Grass and Leaves
Sketch the grass and leaves lightly, then add details and shading. Use quick, upward strokes for grass and more detailed lines for leaves. Pay attention to how the light hits these elements and add shadows accordingly.
Adding Other Mushrooms
Drawing additional mushrooms can create a more dynamic scene. Use the same techniques for sketching, refining, and shading as you did for your main mushroom. Vary the size and shape of the mushrooms to add interest.
Final Touches
Before completing your work, step back and examine your drawing. Check if any areas require additional detail or shading. Make any final adjustments and add highlights to areas that catch the light.
Highlighting Techniques
Use a white pencil or gel pen to add highlights to the cap, gills, and stem. This can make your drawing:plcxcsjeqpq= mushroom look more three-dimensional. Add highlights sparingly to avoid overdoing it.
Signing Your Work
Don’t forget to sign your drawing! Your signature is a mark of pride and accomplishment. Place it discreetly in a corner of your drawing.
Common Mistakes and How to Avoid Them
Even experienced artists make mistakes. Here are some typical mistakes to avoid:
Overworking the Drawing
It’s easy to get carried away with details, but overworking your drawing can make it look cluttered. Take breaks and step back to assess your progress regularly.
Ignoring the Light Source
Shadows and highlights should be consistent with your light source. Ignoring this can make your drawing look flat and unrealistic. Always keep the light source in mind.
Rushing the Process
Good art takes time. Don’t rush through the steps. Enjoy the process and take pride in each stage of your drawing.
drawing:plcxcsjeqpq= mushroom for Different Skill Levels
Whether you’re a beginner or an advanced artist, drawing:plcxcsjeqpq= mushroom can be a fulfilling experience. Here are some tips for different skill levels:
Beginners
Begin with basic shapes and concentrate on achieving accurate proportions. Don’t worry too much about details. Practice regularly to improve your skills.
Intermediate Artists
Experiment with different textures and shading techniques. Try adding more complex background elements to challenge yourself.
Advanced Artists
Concentrate on capturing the delicate interplay of light and shadow. Experiment with different mediums like ink or watercolor to create unique effects.
Conclusion
drawing:plcxcsjeqpq= mushroom can be a delightful and rewarding experience. From understanding their anatomy to mastering shading techniques, each step offers opportunities for artistic growth. Whether you’re drawing for relaxation or to improve your skills, these tips will help you create stunning illustrations.
Ready to take your drawing:plcxcsjeqpq= mushroom skills to the next level? Grab your pencils and start sketching today. And don’t forget to share your masterpieces with our community of artists—they’ll love to see your progress!